I came across a photo taken taken by a guy called Clay Perry in a book on tulips. He is a great flower photographer and any gardening books with his name given as the photographer always finds it way to my bookshelf! I had no intention of painting a botanical replica, but I thought it was a useful starting point.

'From 'Tulip' by Liz Dobbs
Photo by Clay Perry
I started with a simple line drawing of 3 tulips, using the photo as a vague guide. I began the painting by using Pyroll Red and Indian Yellow and lots of water to complete the three tulips.


The stems and leaves were painted using Apatite and Sap Green, with a little Indian Yellow in places, and the markings on the leaves were created whilst the paint was still quite damp, using a twig of Forsythia which has been sharpened to a point with a pencil sharpener.
At this stage I felt the painting was a little too tight, so using plenty of water and the same colour combination, I added patches of colour which I teased into less obvious tulips. I then needed to add the appropriate stems and some additional leaves.

All that remained, was to tackle the background. I erased all the pencil lines that I could, and then using combinations of Apatite Green Genuine, Indigo and Indian Yellow, I washed in parts of the background, keeping the colours strong behind the flowers in the middle and more varied around the edges.

I kept adding washes and darkening corners until I was happy with the strength of the background.
I finally mixed a little Pyroll Red with a tiny amount of French Ultramarine Blue, and used this mixture to darken some parts of each tulip as shadow areas. This is not too evident in the photo but looks stronger in the original painting.
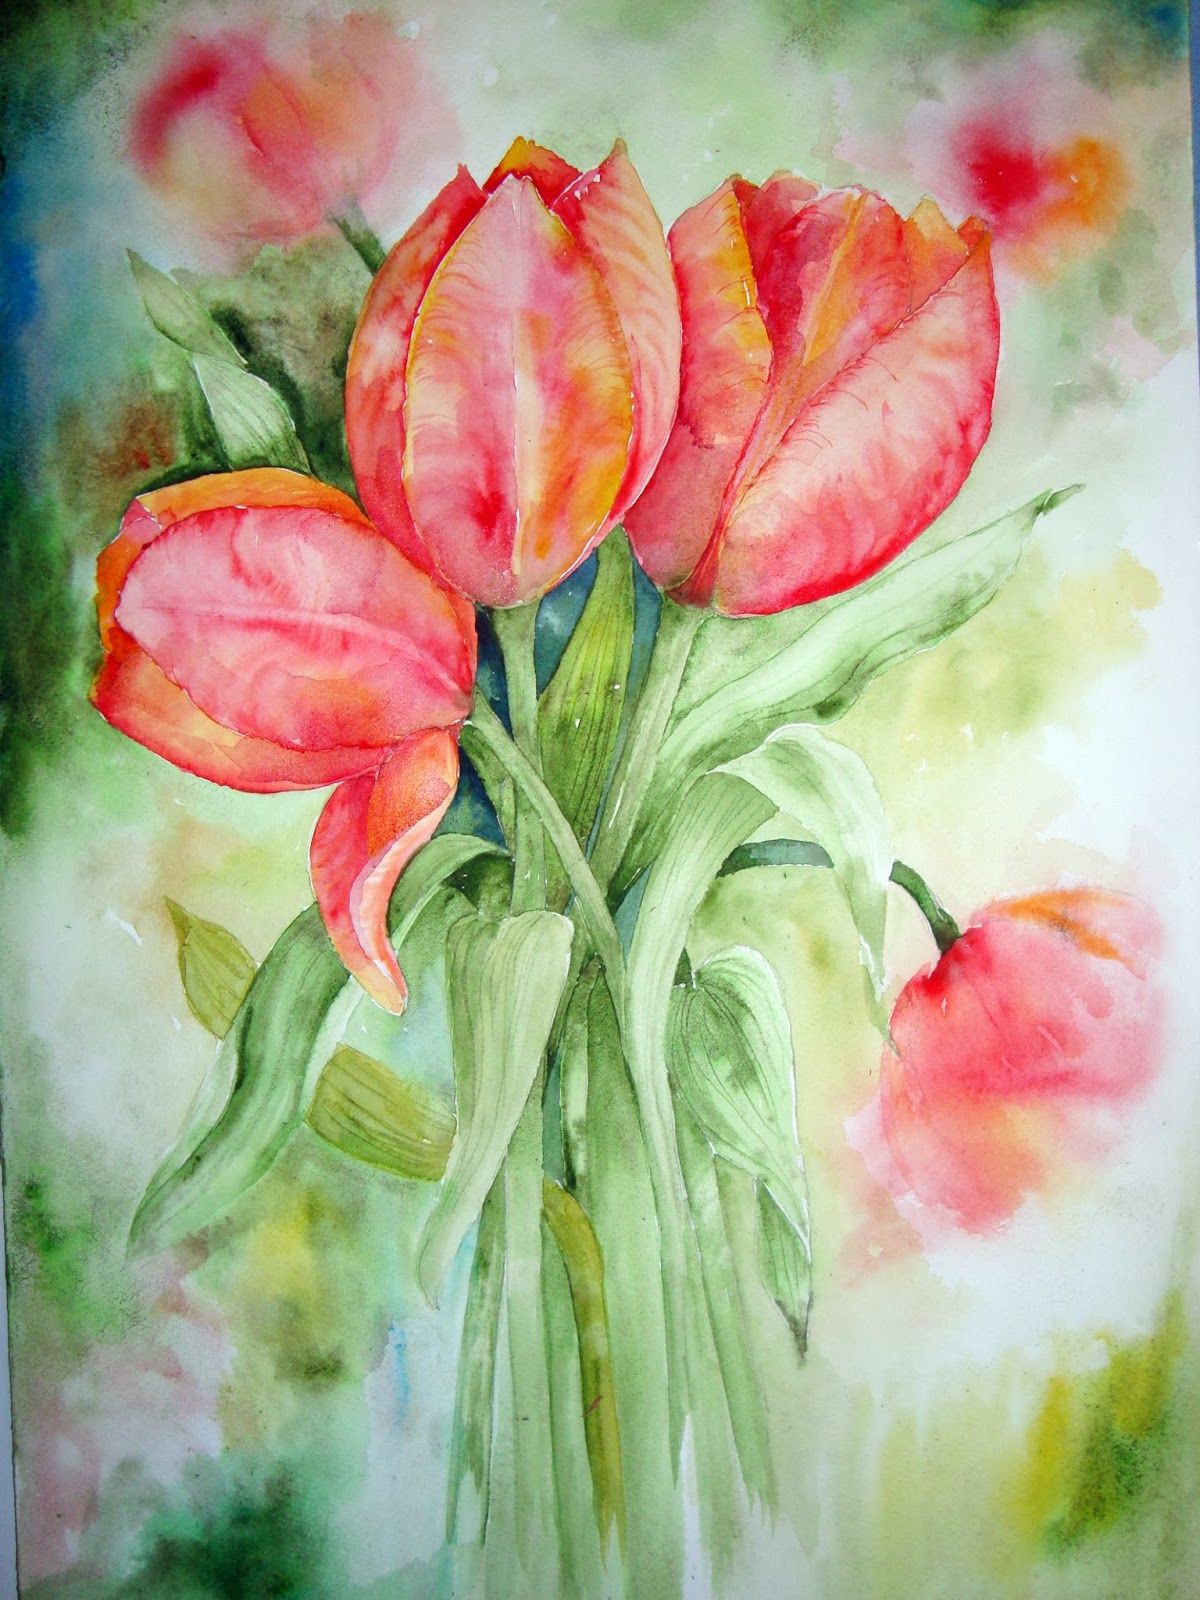
'Red Tulips'
Watercolour on Fabriano Artistico Extra White
300g Not. 35 x 50cms
A painting to enjoy Yvonne. The how-to photos are a bit like watching a magician perform an illusion, you have a wonderful touch with the paint brush.
ReplyDeleteThanks Ray. What a lovely comment. People seem to enjoy looking at the process, so I will continue to present the posts in this way.I don't suppose the teacher in me (not art, I hasten to add!) will ever totally disappear.
ReplyDeleteLovely Yvonne
ReplyDeleteThank you Larry!
ReplyDeleteBeautifully done tulips, Yvonne!!!
ReplyDeleteKathryn
Thank you, Kathryn. I am glad you continue to enjoy the posts
DeleteWhat can one say? As usual very good.
ReplyDeleteThanks Peter.
DeleteJust beautiful as always. I would love to be able to do backgrounds like yours, but I just don't have enough courage I think. Those that I try just look awful.
ReplyDeleteThank you, Christine. I appreciate your concerns with regards to the backgrounds, it has taken me some time to get it to be automatic. I suggest you try washing some paper with water and just dropping brushfuls of colours which go well together into the water and leaving them to blend. Try not to 'paint' the colours on, just drop them in and do not attempt too large an area to start with. Leave patches of white amongst the colours, and vary the strength. Hope that's helpful.
ReplyDeleteThank you for your advice Yvonne. I really appreciate it and will have a go!
ReplyDeleteGreat. Let me know how you get on. Use the backs of old paintings to start with.....much less costly that way.
ReplyDeletebeaufiful!!!
ReplyDeleteThank you Midori. I am delighted that you like the painting.
ReplyDelete